# Videoconference
Integrating Forma Cloud with external videoconference services
# GoToWebinar
The plugin allows the integration between the FormaLms eLearning platform and the GoToWebinar video conferencing cloud service.
The version of API used for integration is the “GoToWebinar API Reference V2”.
## Event creation
\[immagine\]
The following information is required when creating and editing an event.
- Event title
- Description (not mandatory)
- Day
- Time
- Duration
\[immagine\]
The user who creates the event will receive an email informing them that they have already registered for the event with the role of co-organizer.
Please note: due to a restriction of the GoToWebinar service it’s not possible to create “immediate” new sessions, but you must always set a starting time that starts in a few minutes from now, or the classroom will not be created.
## Delete Event
You can only delete an event if it’s not expired
## Enroll users to an event
The participants who can be selected for a GoToWebinar event are among the users enrolled in the course with which the video conferencing function is associated.
## Creation of the Co-organizers
The users with whom it is possible to associate the role of co-organizer are selected from the users registered for the event.
## Session recording
For a past event, it is possible to withdraw from the GoToWebinar cloud, the related link associated with the virtual classroom registration. A virtual classroom event begins when the co-organizer authorizes the start.
Once the event is over or when the co-organizer leaves the session, the registration processing phase begins. The registration link is available when registration processing is complete. When you have the link of the session, you can publish it in the “Registrations” section in the “Past events” tab.
The participant will have the opportunity to view the registration link, directly from the list of their expired events.
## Report
The report allows you to track participation to the single session, displaying login and logout date and session duration.
Please note: the event session begins when the co-organizers authorizes the event start.
# Key Meeting
The plugin allows the integration between the FormaLms eLearning platform and the [Key Meeting](https://keymeeting.it/) video conferencing cloud service: it allows instructors to create virtual rooms directly from courses and manage registrations in sync between the Forma database and the KeyMeeting room.
## Plugin Settings
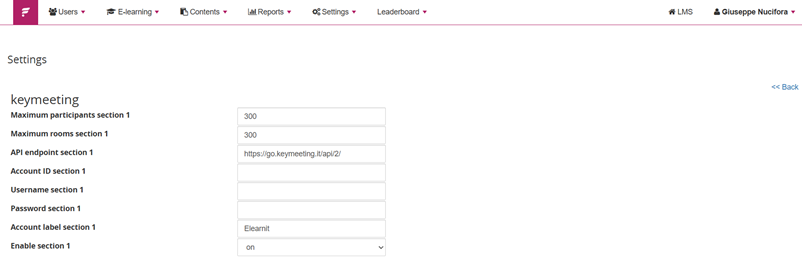
General Plugin settings are available from the administration plugins management section, where you have to fill in the API URL, your username and the API key and Secret Key provided by Keymeeting.
[](https://bookstackprod.s3.amazonaws.com/uploads/images/gallery/2026-08/P5ZuFr2duSh6GQlm-image.png)
### How to fill in the settings
- **max participant**: this is the maximum number of participants in Forma. Of course, regardless of what you put here, it’s your KeyMeeting account that manages this threshold
- **max room**: same as above: you can decide the maximum amount of learners in a room in Forma, but it’s KeyMeeting that manages this.
- **API endpoint**> it’s always *https://go.keymeeting.it/api/2/* (unless KeyMeeting changes it).
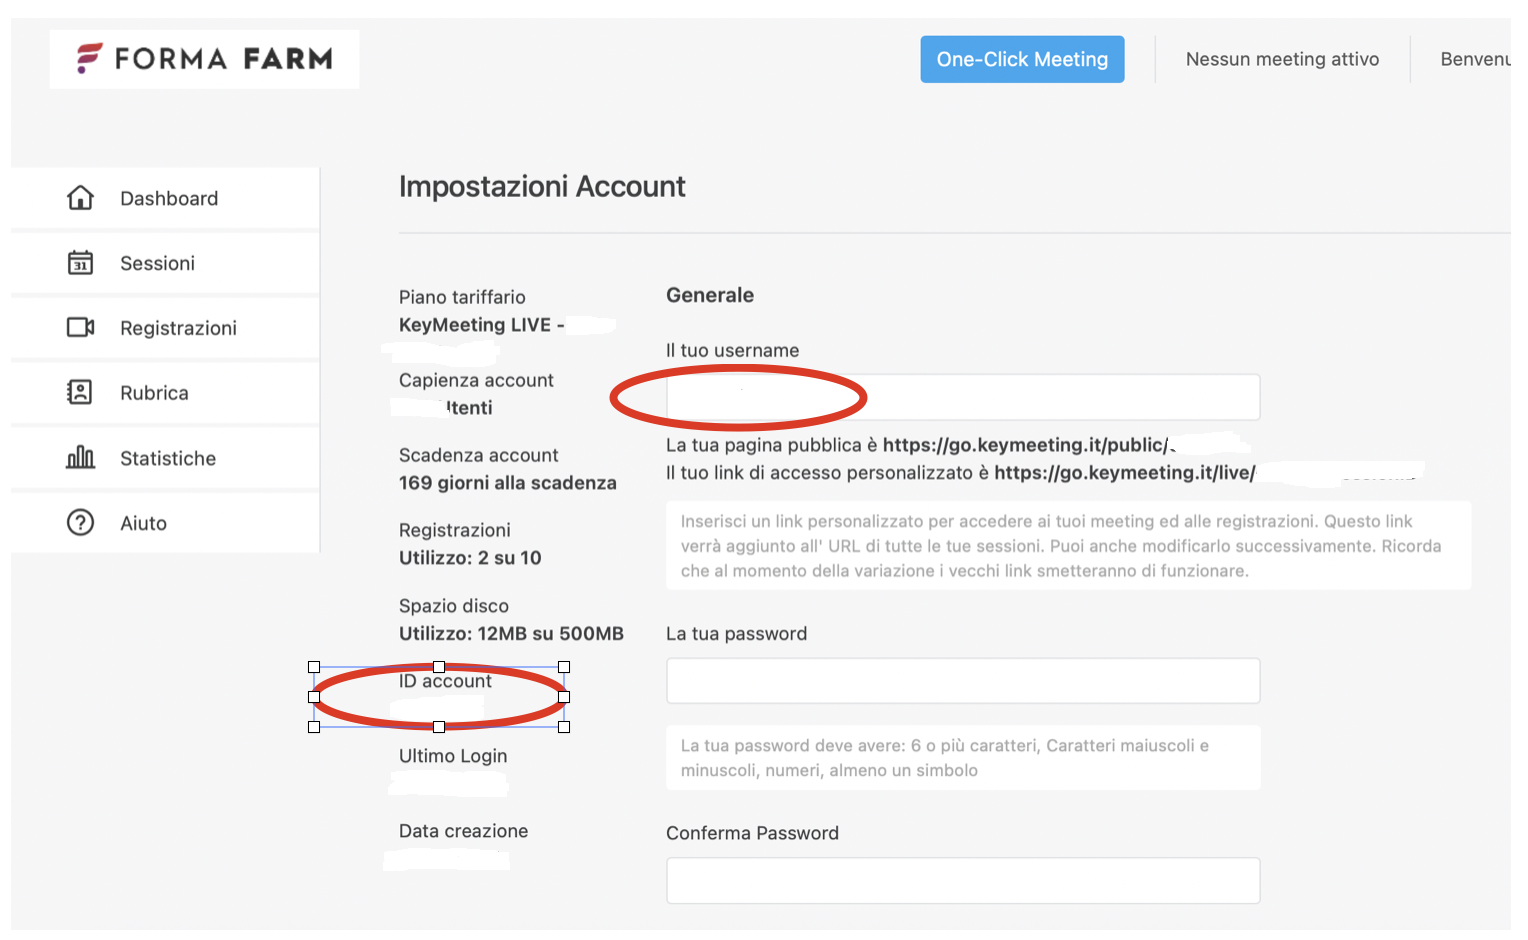
- **Account ID:** you are supposed to insert your username in numeric form, KeyMeeting should give you that number. See below
- **Username**: it’s the user name you are using to log in to your KeyMeeting account
- **Password**: it’s the password of your KM account
- **Description**: it’s a descriptive label
- **Enabled**: it should be set to “on”.
You can find your Account ID here, on your Keymeeting control panel:
[](https://bookstackprod.s3.amazonaws.com/uploads/images/gallery/2025-11/gGU3KqLLqbz90KrY-km-account-id.png)
## Managing Events
### Event creation
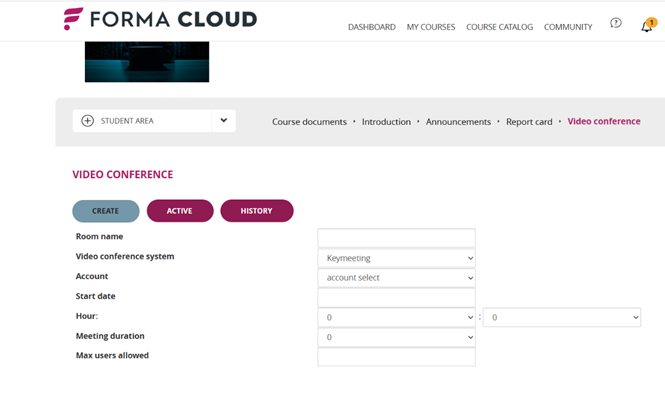
KeyMeeting events will be created and managed from the “Video Conference” module in course teacher area, usually it should be located in the Student Area or Collaborative area: as a Teacher you must be able to manage events, but students must be able to attend.
[](https://bookstackprod.s3.amazonaws.com/uploads/images/gallery/2026-08/2QhMMBQeiuYZ0Y9V-image.png)
The following information is required when creating and editing an event.
- Event Title: Add a title for the webinar
- Videoconferencing System: if multiple service providers are available, choose “Conference Keymeeting”
- Account: if multiple service accounts are available, choose the desired one
- Start Date: Date of the webinar
- Hour: Time of the new webinar
- Meeting Duration: duration in hours
- Max users allowed: max number of allowed participants
#### Role of the host
The meeting host is the Forma Lms account who creates the meeting, regardless if he’s a course administrator or a teacher (it depends on the menu permissions). It’s recommended to keep Keymeeting’s credentials handy, in order to launch the meeting if requested.
### Deleting an event
You can only delete an event if it’s not expired
### Enroll users to an event
The participants who can be selected for an event are among the users enrolled in the course with which the video conferencing function is associated.
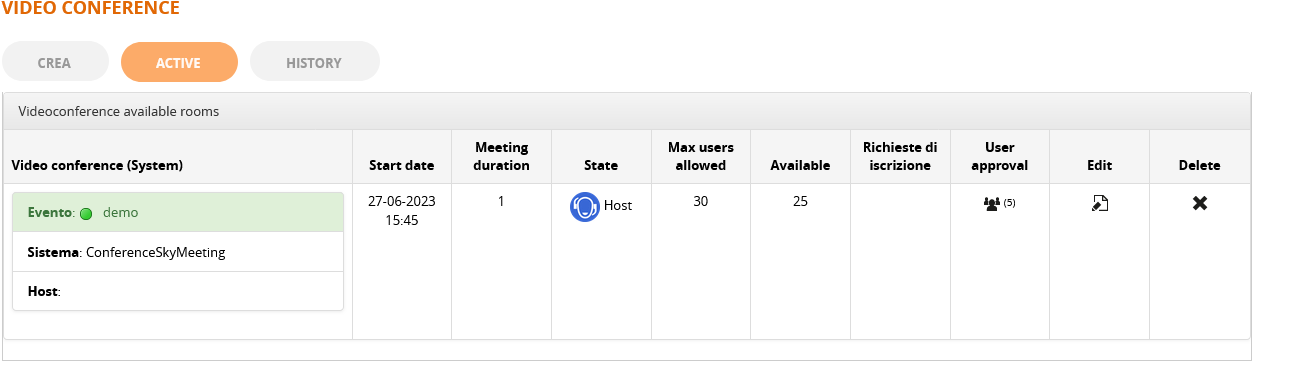
1. In the event list, click the "User Approval".
2. A table will appear showing all users enrolled in the course.
3. Selection: Select the row of the users to be enabled.
4. Confirm: By clicking "Confirm", the system:
- Saves the booking.
- Sends the data to KeyMeeting to generate unique access links.
- (Optional) Sends the invitation email with the direct link.
Please note that only users with an **associated** and **unique** email can be enrolled. Click on “user approval” to enrol users.
[](https://bookstackprod.s3.amazonaws.com/uploads/images/gallery/2024-06/OP9JhceaFue7b4Z9-image.png)
### Accessing an event with Single Sign On
Users will be able to access a meeting both from within a course or, if enabled, from the "videoconference tab" in the MyCourses area
#### Enter an event from the course
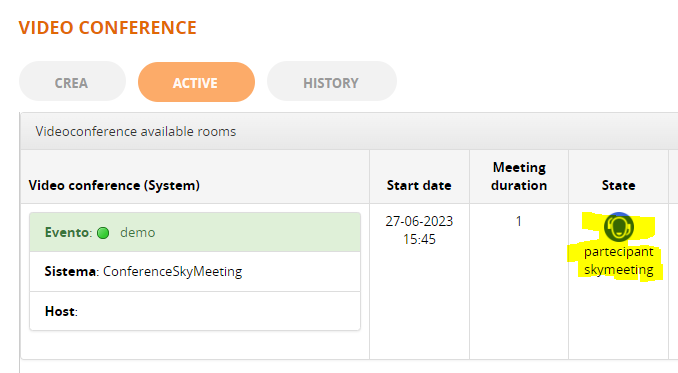
From the “active” TAB, learners will be able to access the meeting in **SSO**, **without having to insert** user and password. They just have to click on the Keymeeting icon
[](https://bookstackprod.s3.amazonaws.com/uploads/images/gallery/2024-06/DQccfk6UTYmGWB2m-image.png)
#### Videoconference TAB
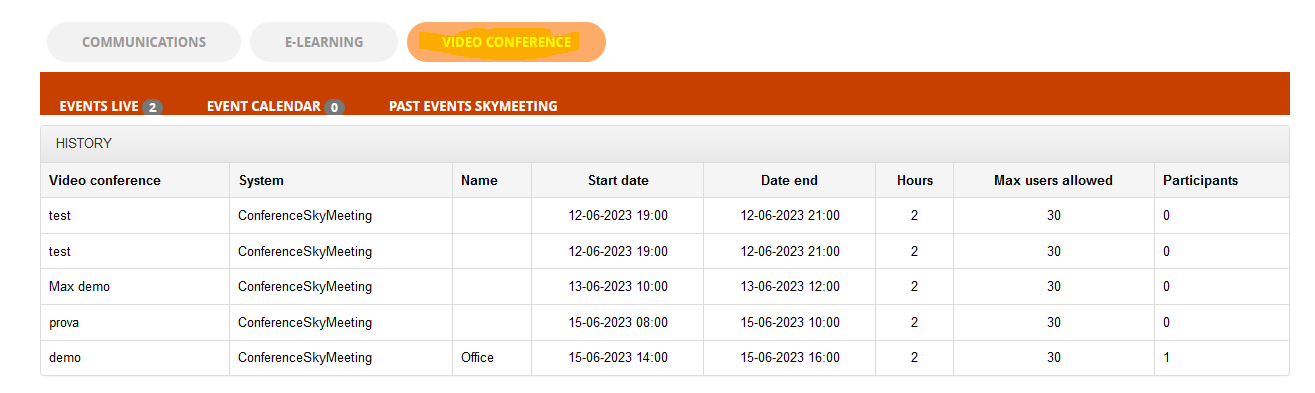
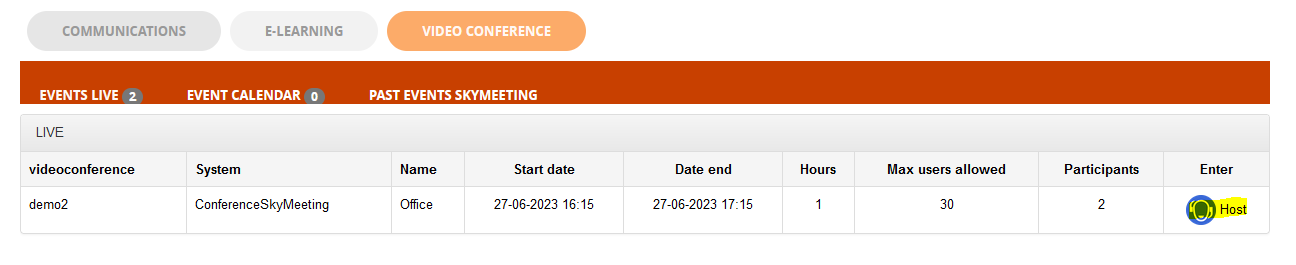
If you enable the videoconference TAB you will also see the live events, the calendar and the past events on the top menu. You will also be able to access the meeting from there.
[](https://bookstackprod.s3.amazonaws.com/uploads/images/gallery/2024-06/eU3Gc59ASMidhHnt-image.png)
[](https://bookstackprod.s3.amazonaws.com/uploads/images/gallery/2024-06/dibdgxe7IHO2QgQD-image.png)
## Report
The report allows you to track participation to the single session, displaying login and logout date and session duration. The log will be visible in the “History” button.
At the end of the event, in the History area of the Video Conference module, the administrator can view:
- List of attendees.
- Connection duration per individual user.
- Any error logs or activity tracking entries.