# Landing Generator
## Plugin Description
The Landing Generator Plugin allows the creation of a custom login and registration page for each course, featuring:
- Dedicated URL
- Add registering users to a specific Org Chart node
- Enroll users to the course
- Choose Standard or Advanced registration, to display either the standard registration form or just the fields associated to the selected node
- Direct login to the course
- Display course and sponsor logo on the login/registration page
- Add custom styles to the page
## Global Configuration
The plugin requires the Forma API’s to be enabled and fully configured under
*Administrator > Settings > General Configuration > API & SSO*
Check the official forma documentation for details on the [API configuration](https://docs2.formalms.org/books/reference-guide/page/system-configuration)
## Features
Plugins features are available inside the standard menu edit form. Go to:
*Admin > Elearning > Course*
And click to edit your course
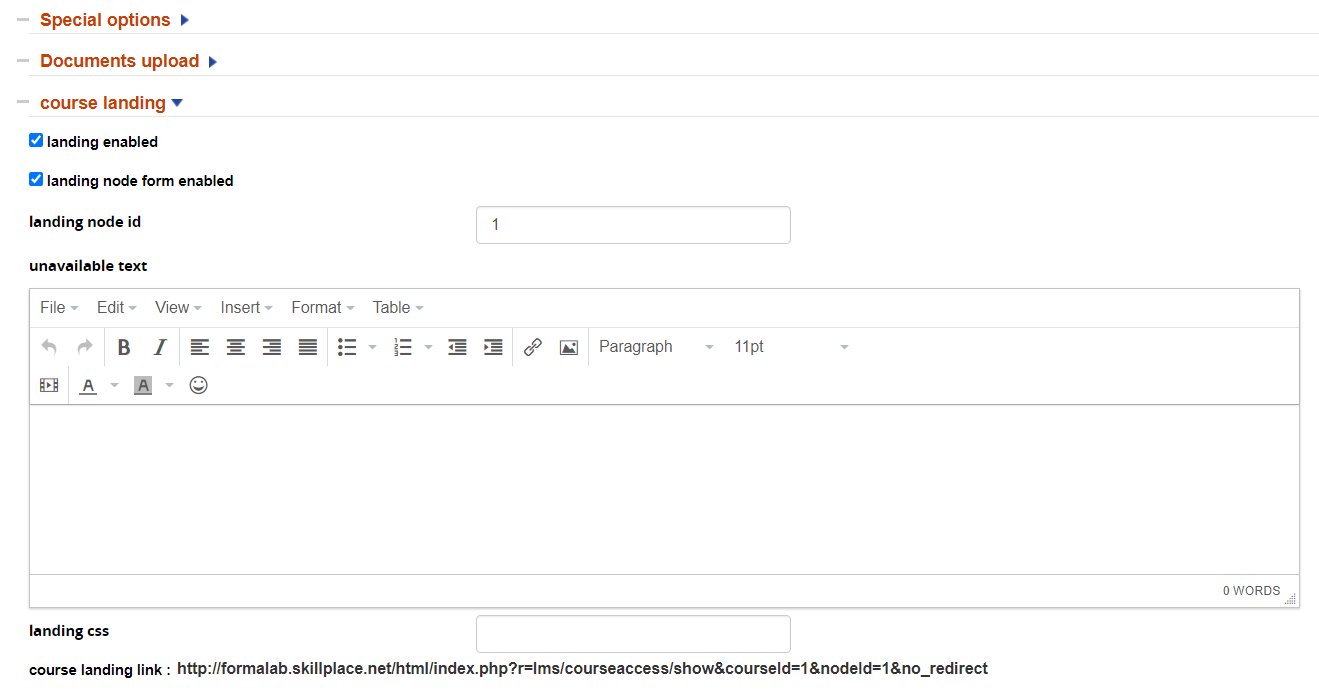
Plugin Settings will be available under the tab “course landing”:
[](https://bookstackprod.s3.amazonaws.com/uploads/images/gallery/2024-06/PFNsOFAIjCDppqPB-image.png)
- **Landing Enabled**: activate or deactivate the landing page
- **Landing node form enabled**: use custom node fields instead of the standard registration form
- **Landing node ID**: insert the ID of the node to be used for user registration and field selection (see note below)
- **Unavailable Text**: Enter a text to be displayed when the course is closed or unavailable to user
- **Landing CSS**: add a stylesheet class for the landing page
- **Course landing link**: URL of the landing page
Notes:
1. platform registration must be enabled
2. to retrieve the node ID, go to user management, right-click on the “assign users” icon and copy/paste the link URL to your notepad. The node ID will be the last number in the URL, i.e: http://testing.formalms.org/testing/appCore/index.php?r=adm/usermanagement/assignuser&id=***4***
### Multiple Templates and URL
The landing generator only creates landing pages with the default URL.
But if you simply change the part of your URL before the /index.php and replace it with the desired, different, URL it will also work with your other templates and URL’s.
\[Your Platform URL\]/index.php?r=lms/courseaccess/show&courseId=1&nodeId=1&no\_redirect
Finally, it’s a good idea to use **URL shorteners**
## Landing Page Layout
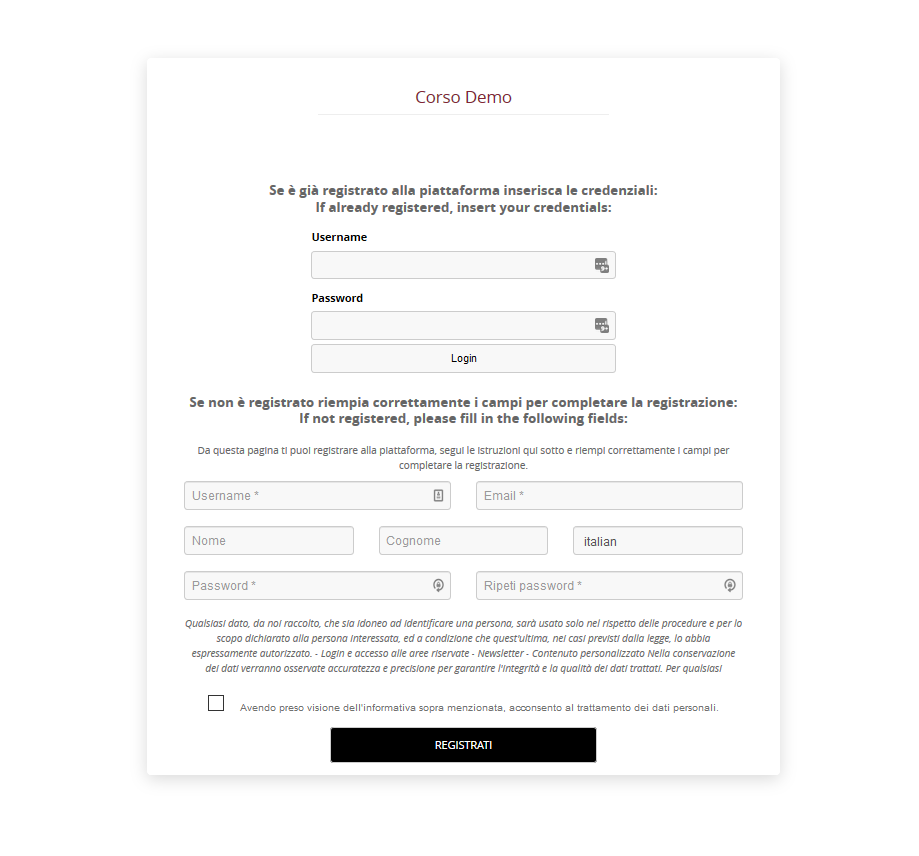
This is an example of how your login/registration page will look like.
If you inserted the course logo it will display on the left, and if you inserted the sponsor it will display on the right.
[](https://bookstackprod.s3.amazonaws.com/uploads/images/gallery/2024-06/ywOT1RwPpstBWiXJ-image.png)